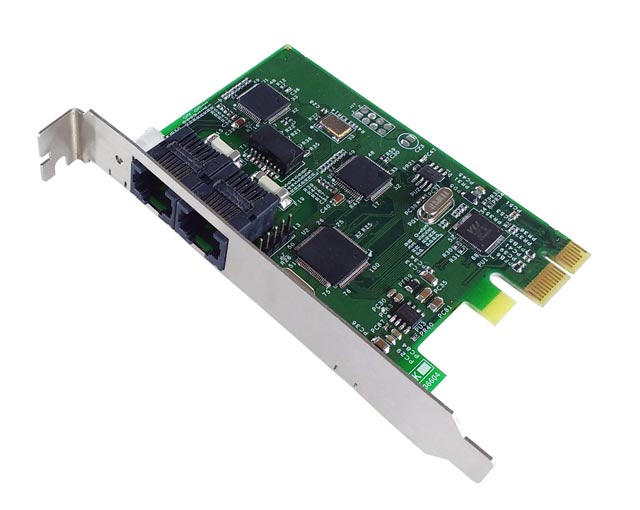
Single ISDN PRI PCIe Logger Card (OCH-LDA-01)

 Logger Card Driver Package
The download link given below installs the Ocha Logger Card driver for Windows 7, Windows 8 and above. Click on the required link to download the driver package.
-
Driver for Windows 8 & above
Version:
Size: -
Unified Driver for Windows
Version:
Size:
Note: Please update the Ocha Card driver to the latest version (version ) from the above given link before proceeding with the installation instruction.
How to install the Logger Card Driver
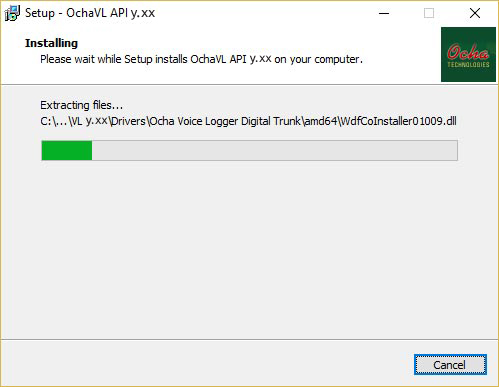
- Double click on the downloaded file to execute and install the Logger Card driver.
- Setup Wizard will appear, press “Next” to proceed.
- Select the destination folder to install the OchaVL API y.xx (here 'y.xx' denotes the latest version of Ocha API, version ). Press “Next” to continue.
- Click “Next” to continue.
- Installation process takes place and the OchaVL API y.xx will be installed in the computer.
- Click “Finish” to complete.
- After installation, shutdown the PC and follow the steps given below to fix the Ocha Logger Card on the PCI Express slot:
(The Single ISDN PRI PCIe Logger Card has built-in splitter and does not require an external splitter for installation.)
- Unplug the power cord cable before opening the computer chassis to avoid electric shock.
Note: Always ground yourself while working with computer components by using an anti-static wrist strap to discharge any electrostatic buildup. Grounding helps to prevent the risk of damaging the computer components through electrostatic discharge (ESD). - Open the cover of the computer chassis to access the PCI/PCIe slots.
- Identify the PCI Express slot for fixing the Ocha Logger Card.
- Remove the existing screw from the metal plate corresponding to the PCI Express slot.
- Fix the Ocha Logger Card on the PCI Express slot and tighten the screws. Ensure that the Logger Card is firmly seated on the slot.
- Make sure that the output ports of the Logger Card are accessible from the back panel of the computer.
- Put the cover back on the computer chassis, plug in the power cord properly and switch on the computer.
- Unplug the power cord cable before opening the computer chassis to avoid electric shock.
- After the successful installation of Ocha Logger Card, the LED status will turn green and blinking, else LED appears red and blinking.
- In Device Manager, the Ocha card will be detected as Ocha Voice Logger Digital Trunk under OCHA or Universal Serial Bus Devices.


Note: In Windows 8, Windows 8.1 and Windows 10, the driver will be automatically detected and installed. For Windows 7 and older versions, if automatic updation fails, then the driver should be updated manually as given in the below mentioned steps.
- Follow the steps given below for the manual updation of the driver:
- Go to Device Manager, the device will be detected under Other devices as Universal Serial Bus Controller with a yellow exclamation sign. Right click on Universal Serial Bus Controller → Update driver software → Browse my computer for driver software (set the path as C:\Ocha\VL y.xx\Drivers (here 'y.xx' denotes the latest version of Ocha API, version ), then click "Next".
- After completing the updation process, the device will be detected under Other devices as xHCI Root Hub 0 with a yellow exclamation sign. Right click on xHCI Root Hub 0 and follow the same steps given above for manual updation process.
- After the final stage of manual updation, the device will be detected under Other devices as Ocha Voice Logger Digital Trunk with a yellow exclamation sign. Right click on Ocha Voice Logger Digital Trunk detected under Other devices and perform the steps for manual updation process again.
- At the end of the process, the successfully updated Ocha card will be detected as Ocha Voice Logger Digital Trunk under OCHA or Universal Serial Bus Devices. If Ocha card is not detected and if the device is detected as “WinUsb” device under Universal Serial Bus Devices then click troubleshoot to resolve the problem.
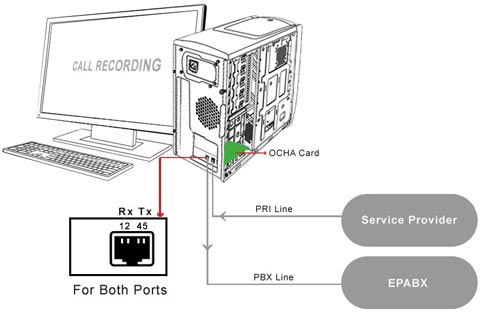
- Now, connect the ISDN PRI line as shown in the above diagram.
- Finally, to ensure the working of the Ocha Card from API versions 1.04 or higher, select the downloaded file from C:\Ocha\VL y.xx\Samples (here 'y.xx' denotes the latest version of Ocha API, version ). On selecting the file, two folders named C# and VC are found. The folders represent the corresponding programming language, which the user could choose as per requirement. After choosing either one of the folders, select the folder BasicLogging and proceed with execution of the ".exe" program.
- In case Firewall blocks the execution, select the checkbox corresponding to Private and Public within the option BasicLogging.exe to allow access. The LED status will appear as green if the line is up while running the .exe file.
- Make a test call and check whether the calls are recorded to ensure that the Logger Card is working properly. The recorded files will be available within the folder named "Waves" in the BasicLogging folder.
Ocha Logger Card LED Status Indicators
| Sl. No. | LED | Status |
|---|---|---|
| 1 | Red & Blinking | Ocha driver not detected |
| 2 | Green & Blinking | Driver installed & Ocha card is detected |
| 3 | Stable Green | On successful execution of basiclogging.exe |
| 4 | Green & Red Blinking | PRI line is down |
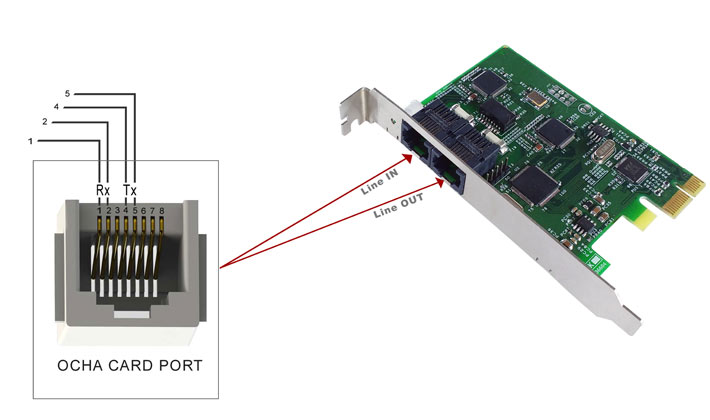
Ocha Card Pinout Configuration

Ocha Logger Card port uses the standard RJ45 connector for E1 link.

This completes the installation of Logger Card driver, for further technical assistance please feel free to contact us at 